
Set up Time Machine in macOS 26
[toc]
Time Machine is Apple’s built-in backup system for your Mac. As long as your drive is connected to your computer, it will back up all changes every hour. Over time, Time Machine keeps a history by saving hourly backups first, then rolling older ones into daily and weekly snapshots, and it automatically deletes the oldest backups when the drive fills up. Once it's set up, I recommend that you leave it connected as often as you can. If you have a desktop computer or if you work at a desk with your laptop, you can even leave it plugged in all the time.
This guide walks you through setting it up in macOS 26, plus the important caveats people often miss. Other versions will be similar, and I’ll try to update this each year when things change. At the end, you’ll find step-by-step instructions to erase your old Time Machine drive.
If you run into trouble with any of this process or if it looks daunting, I invite you to book a short remote appointment on my website.
What you need before you start
1) A backup drive
I outline my recommendations in another article.
For simplicity and reliability, I recommend dedicating this drive to Time Machine for one Mac. Any existing content on it will be erased, and it cannot be used for anything else, so if it already has files you want to keep, be sure to copy them off.
2) Your Mac login password (administrator password)
This is the password you use to sign in to your Mac. When you choose to encrypt your Time Machine backups, macOS will also ask you to create a backup password. Unless you have specific security concerns, I recommend making it the same.
Step 1: Connect your backup drive
Plug the drive into your Mac.
If prompted, click the button to allow the accessory to connect.
Step 2: Open Time Machine settings
Click the Apple menu () in the top-left corner.
Choose System Settings.
Click General in the left sidebar.
Click Time Machine.
Step 3: Remove existing backups (optional)
Though you can have multiple backups, a single backup suits the needs of most people. So you should probably remove all existing backups from this list.
Click to select any backups you are retiring or are no longer in use, and click the "-" button below the backup list for "Forget Backup". This will not erase the backup drive; it simply tells the computer that it no longer backs up there. More on erasing the drive later.
Step 4: Add the drive as your backup disk
Click Add Backup Disk (or the Add (+) button).
Select your external drive.
Click Set Up Disk.
Step 5: Choose encryption
During setup, you may see an option to Encrypt backups. I strongly recommend this, as without it, anyone could pick up the backup drive and have full access to all of your files.
This screen behaves unlike almost any other text entry box on your computer, so it looks a little weird. It's right-aligned, so when you click the boxes, the cursor is all the way to the right. As you type, your entry gets pushed left.
Enter a password for your backup. I recommend making it the same as the computer password so that you don't forget it. If you forget the password, your backup can not be retrieved.
Re-enter your password in the verification box
Enter a password hint such as "Same as computer password"
Step 6: Let the first backup run
After setup, Time Machine should start automatically.
Your Mac may feel a bit slower during the first backup.
It is okay to use your Mac, but avoid unplugging the drive or closing the lid of the computer. If you do, just reconnect the drive or open the lid and it will resume.
If you use a laptop, plug into power.
Step 7: Confirm it is working
Go back to:
Apple menu () → System Settings → General → Time Machine
Look for:
The backup disk listed
The time of the last backup
If you see a recent “Last backup,” you’re in good shape. If it's in the middle of a backup, you'll need to wait for it to complete before you can see the dates.
Step 8: Save the password to your keychain
The next time you connect your backup drive, a prompt will appear to enter the password to unlock the disk. So that you don't have to enter your backup password every time you connect it, I recommend checking the box to remember the password.
Caveats and warnings
Time Machine is not the same as iCloud
iCloud is a syncing service: it helps keep the same files on multiple devices. Time Machine is a true backup, it keeps past versions.
If you delete something and it deletes everywhere in iCloud, Time Machine can often get it back.
Time Machine also backs up most of the data on your computer except a few very sensitive items like your fingerprint and Apple Pay. iCloud only backs up a few specific items. Probably the most important items, but it's far from everything on your Mac.
One backup is good enough for most people
A single backup drive is good enough for most people. But there are a few reasons you might consider two:
Keep a second offsite backup drive. Store it at a trusted place (like a friend’s house) and swap it with your home backup about once a month. This helps if you ever have a fire. (Most fireproof safes still get too hot for drives.)
If you spend long stretches away from home, consider a second backup drive for travel.
If you’re a student away at school, consider keeping a backup drive in your dorm while another backup stays safely at home.
Don't travel with your backup drive
Don’t travel with your only backup drive. If you have two drives, keep one at home and travel with the other. Otherwise, if your computer bag gets lost or stolen, your computer and your backup drive could disappear together.
Connect your drive regularly
Your backup drive is only as good as the last time you connected it. So I recommend plugging it in as often as possible. If you work at a desk you can leave it plugged in continually. But if you don't, I recommend plugging it in at least once a month, or once a day if you are working on an important project.
Don't delete things from your computer assuming they are in your backup
If you do, then it's your original, not a backup. Time Machine will also remove old items after some time to make space for new backups.
By default, Time Machine only backups up what is on your computer
Time Machine does not back up content from the cloud unless it is synced to your computer. If you have the storage space on your computer, I recommend not enabling "Optimize Storage" in your iCloud settings. This keeps a full copy of your iCloud data on your computer, meaning it will be backed up.
Time Machine backs up email that’s stored locally in the Mail app on your Mac (or another email app). But it won’t back up messages that only exist on a website like Gmail or Outlook and aren’t synced to your Mac. If you want time Machine to back up your email you will need to use an email app like Apple Mail.
External drives and thumb drives are not backed up unless you go into your Time Machine settings to remove them as an exception while the drive is connected.
How to erase your old Time Machine drive
People erase an old Time Machine drive for two main reasons:
You are reusing it for something else.
You are retiring it, selling it, giving it away, or recycling it.
Warning: Erasing a drive deletes its contents. Double-check you are erasing the correct drive.
Step 1: Make sure you no longer need that backup
Before you erase:
Confirm you have a newer backup that you trust.
If this is your only backup, do not erase it yet.
Step 2: Disconnect other external drives
It's really easy to accidentally erase the wrong drive. I recommend disconnecting all drives from the computer except for the one you want to erase.
Step 3: Erase the disk
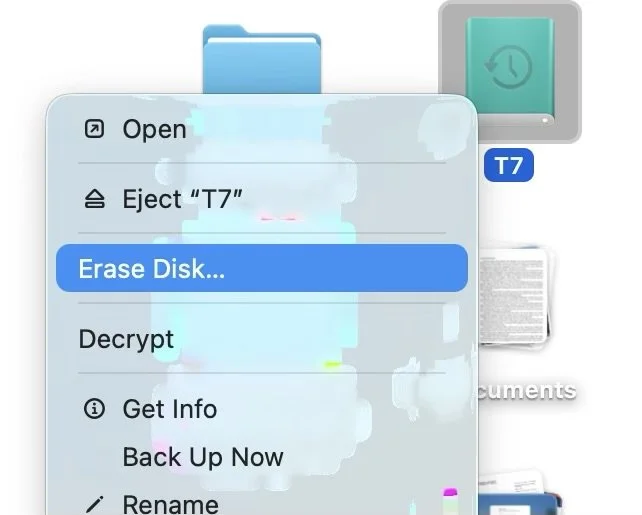
Locate the drive on your Desktop or on the Finder sidebar and click it while holding the Control key on your keyboard (or right click it)
From the popup menu, choose "Erase..."
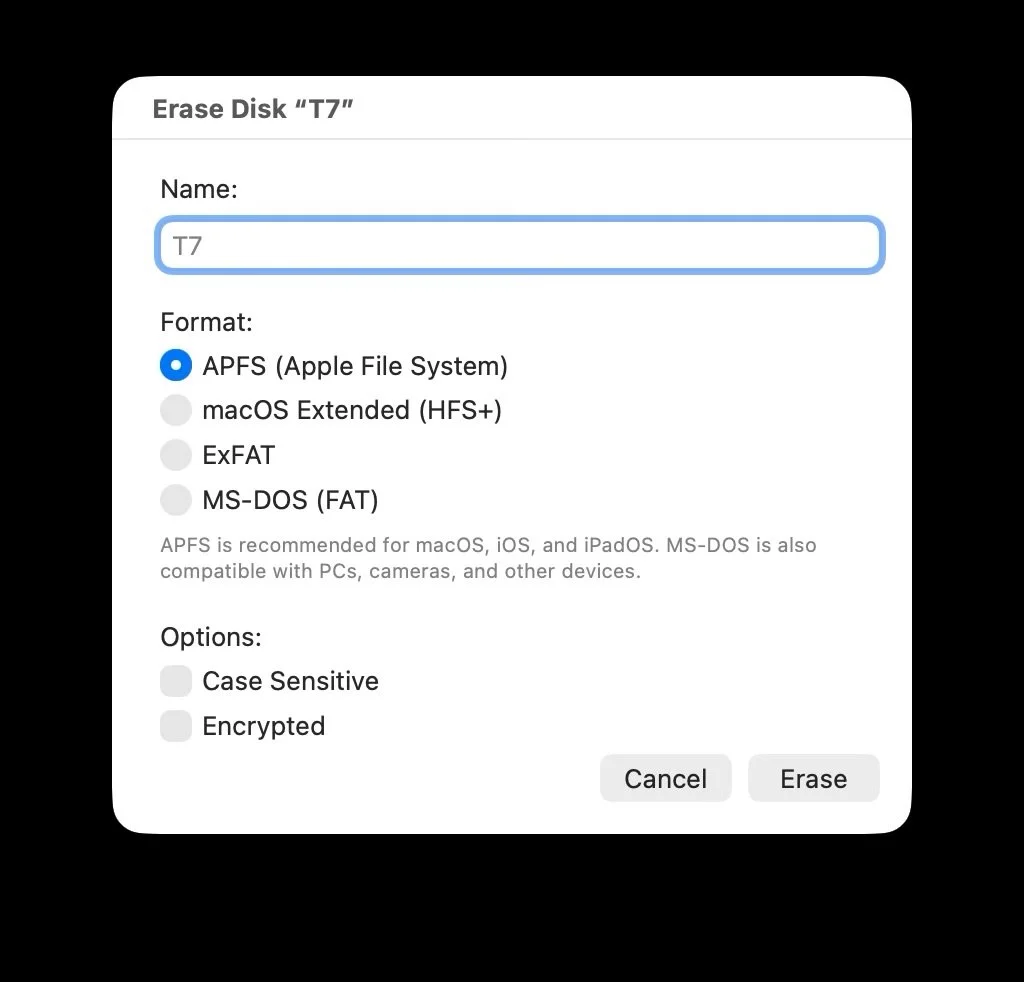
In the window that appears, choose the format you would like to apply to the drive. APFS is best if the drive will be used exclusively with Mac. exFAT is best if the drive will be used on both Mac and Windows. If you will be recycling the drive, the format doesn't matter.
Click the "Erase" button to begin formatting the drive.
Step 4: Recycle the drive
If you no longer have a need for the drive or if you think it is too old to be trustworthy, you can recycle it. Staples, Best Buy, and Target stores usually accept them. If you’re giving the drive away, make sure to erase it first. In many areas, your city’s e-waste program is the most reliable option. If you are unsure, earth911.com is a great resource.